
If you’re looking to improve the readability or accessibility of the site, you might be searching for how to change font size in WordPress. The good news is that there are four different ways to do this – each with their own pros and cons and optimal use cases. The four ways to change the font size in WordPress are:
Changing Your Text Type
If want to create a subhead or make a single paragraph slightly larger than the rest of the text, you can easily change the type of text from “standard” paragraph text to a heading. With this approach, we are changing the HTML tags that surround the text (typically a <p> tag) to a heading tag (<h1>, <h2>, <h3>, etc). This is doable in both the Gutenberg editor as well as the classic editor.
Gutenberg Editor
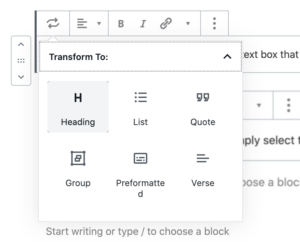
In the Gutenberg editor, simply select the text box that you want to enlarge and change it from a paragraph to a heading.

Then you’ll choose to transform the text to a heading.
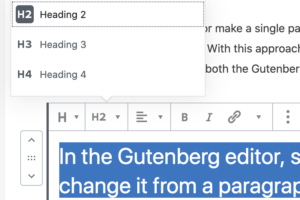
The text will automatically be converted to a heading. The default heading is an <h2>, the second largest heading available (typically the largest heading, the <h1>, is reserved for the on-page title of the post). You can easily change to different headings to make the text smaller or larger.
Classic Editor
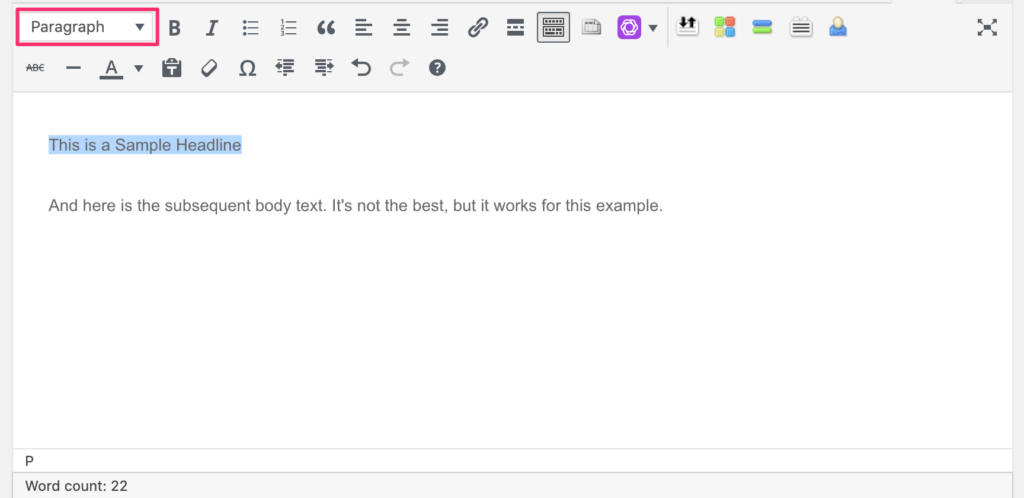
In the classic editor, simply highlight the text you’d like to enlarge and then click to change and select “paragraph” in the text type drop down:
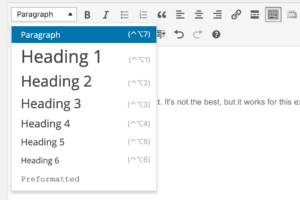
Then select the size of heading that you’d like to change the text to:
Changing Text Size in Gutenberg Editor
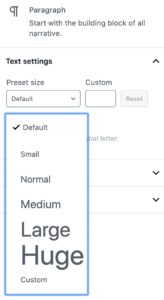
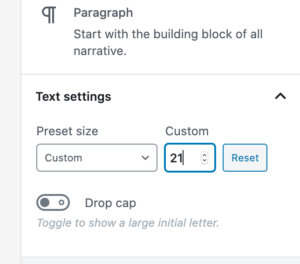
If you want to change the font size in WordPress for a larger block of content, such as a paragraph or more, and you are using the Gutenberg editor, this is a very simple update. Start by creating a new paragraph text block and then navigating to the block settings. In your settings you will see a section for “Text settings” – here you can choose from several default text sizes (default, small, medium, large, huge) or set a custom size.
Using the Theme Customizer
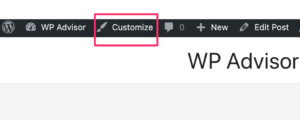
When logged in and viewing your site, you can click on the customize nav element. This will pull up the customizations panel which will allow you to customize most parts of your WordPress theme – including your font size.
To change the WordPress font size, select the “global” settings, then “typography” and finally choose the “base typography” settings.
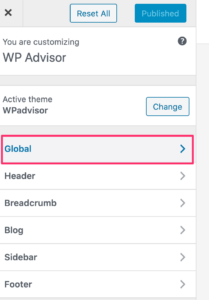
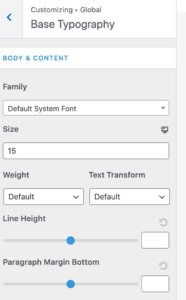
Here you’ll be able to choose the font size for your default paragraph text as well as the font family, font weight, line height and the margin below each paragraph. These settings will apply to all the text across your site. If you are looking to bump up your font size to improve the readability of your site, this is the place to do it.
Modifying Your Custom CSS
If you’re unsatisfied with the above options for how to change the font size in WordPress, there is one option left. This is to update your font size using across the site as well as for specific sections of text. To get started, you’ll want to pull up the theme customizer, as we did in the last step. Instead of going to global settings and base typography though, you’ll go to “additional CSS” at the bottom of the menu.
Here you’ll be able to add custom css to modify the font size of
- Your standard paragraph text
- Specific classes of text to make specific paragraphs different than others
- The HTML headings (h tags)
- Specific classes of HTML headers to make them different than normal headers
All Text on the Website
To update the font size of all text on the website,
body {
font-size: 18px;
}
The Default Paragraph
To modify the default paragraph text format on WordPress, you’ll want to use the following line of CSS
p {
font-size: 18px;
}
HTML Headings (h2, h3, h4, etc)
If you’d like to modify the size of your HTML headings you can easily do this with the following code (make sure to change the <hx> number to match the specific header you are wokring on.
 h3 {
font-size: 20px;
}
Sidebar Text
Using the following code, you can update only the text in the sidebar. Note, in the code below the “.sidebar” specifies that this should apply to the sidebar text class only.
.sidebar {
font-size: 14px;
}
Footer Text
Similar to the sidebar, you can use the following to update the size of your footer text.
.footer {
font-size: 16px;
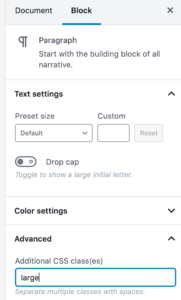
}If you’d like to have one paragraph (or header, or list, etc) that is larger than the others, you can create a new, larger, CSS class and apply it only to the text you’d like to enlarge. The example below would apply to any text with this CSS class applied (ex <p class=”large”>.
.large {
font-size: 26px;
}
That said, it is often wise to associate specific elements (<p>, <h3>, <li>, <a>, etc) with a special class to give you more control. Here is how this would be done:
.large p {
font-size: 26px;
}

.large h2 {
font-size: 36px;
}

.large li {
font-size: 18px;
}

.large a {
font-size: 20px;
}
This CSS class would just be added to the advanced section of the content that you’d like to change the size of. Here’s an example.
Not Recommended: TinyMCE Advanced Plugin
If you’re doing research on “how to change font size in WordPress” – you’ll notice that many different sites recommend using TinyMCE Advanced plugin. That said we don’t recommend using Tiny MCD Advanced to change the WordPress font size for several different reasons:
- Tiny MCE is not compatible with every theme. You might try this method and find out it doesn’t work. Or worse, you might get your theme dialed in and then look to change themes in a year and have less flexibility as the theme would have to ensure Tiny MCE to prevent problems.
- Second, we believe it is better to add a little advanced code and keep your setup leaner to avoid bloat and decreased load times.